The Manifest Manifesto
09/29/2024
Duskmourn is proving to be quite an interesting set. There's just enough fixing to suppport splashes, while at the same time not quite enough that you should always play soup. While there are some stronger and weaker colors, overall things seem to be relatively balanced; every color has its merits. And best of all, the set is chock full of many different overlapping synergies, with lots of depth to explore.
At the center of all of this runs a very interesting new mechanic: manifest dread. It shows up on 23 cards below rare, more concentrated in blue and green but present in all colors to some extent.
And while the mechanic may seem somewhat unassuming on its face - not much unlike a more different way of making 2/2 tokens - the small details in how it works leads to some very deep and interesting play patterns.
So, today let's talk all about manifesting dread: from how to synergize with it; to how to play with it; to how to draft around it; to how to maximize it.
Part 1: Manifest Synergy
When you think of "manifest dread synergy", the thing you probably first think of is the Simic color pair.

a very strong uncommon that carries its archetype
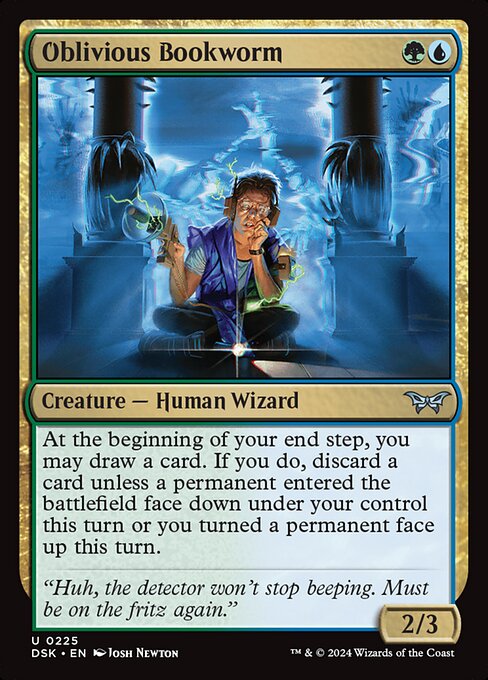
And certainly, cards like Bookworm and
Paranormal Analyst can be quite strong synergy pieces that reward you for playing many cards that manifest dread. But while those synergy pieces are in fact quite real and present, I actually find myself much more often taking advantage of the smaller, subtler synergies naturally present with manifest dread. And as the more explicit manifest synergies are fairly obvious, I'm going to focus on the subtler parts of the mechanic instead.When Rectangles Meet Cards
You may have heard of "rectangle theory" - a term I think coined by Ethan Saks to describe the phenomenon where cards that make multiple "rectangles" (often tokens) are often more valuable than you might expect. The reasoning behind this theory is roughly that there are often many ways in Magic to convert one kind of resource to another - so it's generally fairly easy to turn any extra rectangles you have lying around into more real card advantage, even if those rectangles don't have quite as much inherent value on their own.
Manifest dread generally satisfies rectangle theory quite well - after all, it is inherently a mechanic that puts extra rectangles onto the battlefield, in a process not unlike making 2/2 tokens. But not all manifest dread cards fit cleanly into this framework. Consider the card literally named
Manifest Dread - it doesn't really put multiple rectangles onto the battlefield, and yet it still manages to hook into several useful synergies beyond just being a 2/2.So clearly there's something going on here besides simple rectangle theory. Manifesting dread doesn't just gain value from putting extra cardboard into play; it also gains value because the cardboard it generates are real cards, not just tokens. And this value can manifest (heh) in many different ways:
Delirium
One of the more obvious synergies generated by manifest dread dealing with real cards is that it ends up helping a lot with fueling delirium, and graveyard synergies in general. In fact, you can kind of think of every instance of manifest dread as fairly similar to "mill 2" - except that one of the cards only goes to the graveyard after your 2/2 dies.
It's important to note that, even with the delayed nature of the second card going to the graveyard, it's still much closer to mill 2 than mill 1, as you get selection! You can choose to prioritize putting the types you're missing into your graveyard, after all. As such, a single
Manifest Dread can get you almost entirely to delirium just by itself, making it quite a nice 2-drop those decks.
basically Stitcher's Supplier
And while delirium makes up the majority of this set's graveyard synergies, there are still quite a few other impactful ways to have manifest dread fuel graveyard synergies - consider strategies like
BW reanimator; or single cards like Fear of Infinity; or even convoluted combos like fueling Defiled Crypt with manifest plus Paranormal Analyst!Creature Selection
The first time I manifested dread, I instinctually tried to put one of the cards in my hand - probably I had spent to much time playing
Pioneer Phoenix lol. Since then though, I've quickly internalized that manifest dread does not, in fact, put cards into your hand. In fact, as I'll get to later in this article, this can sometimes be a very relevant thing to consider!But while manifesting dread doesn't put cards directly in your hand, one thing it does do is help you dig deeper for any strong creatures you might have.
As such, you could say that manifest dread is synergistic with basically any high-rate creatures in your deck, especially if they're cheap. Granted it's not great with ETB effects; but any other strong card, like perhaps
Gremlin Tamer, can make your manifests just so much more impactful.When you have both manifest dread and high-impact creatures in your deck, your manifests make your creatures better by giving you more consistent access to them; while at the same time your creatures make your manifests better by giving you great ways to utilize the facedown 2/2s you get - namely, by turning them faceup.
Bouncing Back Value
Finally, even though the only cards you can naturally use while facedown are creatures, there are still a few ways that you can let your facedown noncreatures become relevant!
Notably, since they are still real cards while on the battlefield, you can still interact with them the same way you'd interact with any other card. So, this means any effect that returns a manifested creature to your hand will give you access to whatever was put facedown as that creature (though of course your opponent will see it first). And anything that exiles a facedown and then returns it will have all permanents coming back as their front side. (either the
one mythic that blinks or simply the o-ring being destroyed).This can actually be a quite impactful way to make use of your extraneous 2/2s, if you have the right tools. And it's helped by the fact that basically all of the ways to bounce your own permanents in the set -
Fear of Isolation, Get Out, Unnerving Grasp, and Bottomless Pool - are already quite desirable, partly because of their synergy with rooms.Synergy Subsidizing the Small
I hope by now I've done a good job of demonstrating just how wide the swath of synergies with manifest dread is. But while all of these synergies are great at increasing the value inherent to manifests, it's good to keep in mind that the baseline of manifesting is generally not amazing!
You would absolutely not play Manifest Dread as just a literal grizzly bear - so in order to justify its inclusion, you do have to actually have significant synergies that you can consistently take advantage of. And on top of that, you also need to be mindful that either those synergies or the rest of your deck make up for the cost of playing a literal grizzly bear - specifically, ways to catch up from being slightly behind on board.
Playing clunky value synergy to payoff playing a grizzly bear or a
gray ogre or a hill giant is not a particularly good plan, unless you have other ways in your deck to subsidize doing so.So, make sure to keep this in mind as you draft and build your decks. Synergy is not good purely for the sake of synergy. In the end, the goal is ultimately to build a powerful, well-rounded deck - and synergy is simply one of the many ways to achieve that goal.
Part 2: The Most Dreadful of Creatures
When you have a lot of ways to manifest dread, a very natural question to ask is: what kinds of creatures should I put in my deck to manifest? Should they be big or small? Should I bias towards more utility creatures? How important is flipping manifests face up, really?
Cheating on Costs

EYE SEE YOU
Naturally, some of the best hits from a manifest are creatures that are in some way oversized, but have some cost or downside that gets bypassed by being manifested.
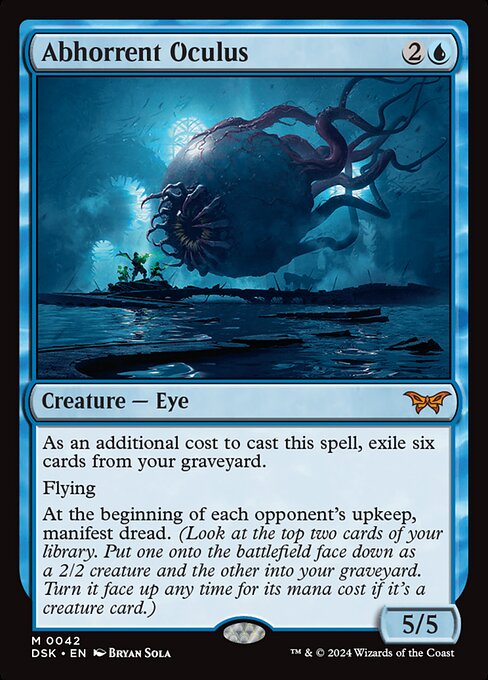
This can include creatures with additional costs, like
Abhorrent Oculus or Fear of Exposure; creatures with ETB drawbacks, like Patched Plaything; or even something as simple as a creature with defender that you can flip mid-combat, like Stalked Researcher.These are all pretty simple and self-explanatory - and at the same time, involve some of the best targets. If you have these cards, you can consider drafting more manifest specifically for this kind of interaction.
Big or Small?
Okay, so obviously the oversized-undercosted creatures are the best manifest targets. But what about regular, mostly-vanilla creatures? What sizing and cost is ideal for these? Would you rather have a 3 mana 3/3, a 4 mana 4/4, or a 6 mana 6/6 as your facedown manifest?
Well, the answer is complicated. Of course, the worst statelines are the ones that are 2/2 or strictly less - if the card is otherwise vanilla, then it basically functions just as any noncreature would, as you have very little reason to flip it up.
But beyond that, it can really depend on your deck.
Some decks will want to use manifest as a lategame mana sink - if you're lacking in those, then it can be nice for your manifests to be relatively large, as you'll probably have the time to devote to improving your 2/2s.
But if you already have plenty of lategame power, and plenty of cards to spend mana on (like perhaps rooms), then you'd probably get the most value out of cheaper flip-ups that provide small marginal value. Perhaps a card like
Flesh Burrower, which can surprise ambush a large attacker for a big tempo swing when you need it, but overall provides only situational value.Interestingly, this also just naturally lines up with the creature suite your deck is already predisposed to want. Perhaps this is unsurprising - essentially what happens when you flip a manifest face up is that you get to cast that creature, except with flash, without ETBs, and by paying a 2/2 instead of a card. So it's quite natural that decks would want to cast cards that they already want to cast.
So in that respect, I would not generally think of manifest as a factor that affects what creature sizing particularly - as it should simply go in the same direction as the rest of your deck's desires.
Augmenting Abilities

cute!
As I've mentioned above already, manifest can be a great way to find your high-quality creatures more often. But in addition to finding your creatures, manifest can also occasionally augment your creatures.
Specifically, there are a few ways to manifest - most commonly
Moldering Gym and Underwater Tunnel - that put counters on the manifest, as well as one UG uncommon that adds counters when the card is flipped up. And of course any creature can benefit from counters - but creatures with good keywords can do so more than most.As such, if you have many augmented-manifest cards (megamanifest, if you will), consider prioritizing keyworded creatures a bit more. Whether it be
flying, lifelink, or even something more in-depth like a good attack trigger; it can be quite nice to be able to better leverage those extra counters for more than just vanilla stats.Part 3: Dreadful Deck Downsides
There's one last thing I want to go over with regards to building decks with manifest dread: specifically, the downsides of playing a plethora of cards that essentially mill you for two.
No Crabs Required

one of the worst versions of this effect, in one of the most-likely-to-deck-you sets
There's of course the concern of literally decking yourself. As it turns out, there are quite a lot of cards in this set that remove 2-3 cards from your deck by themself - consider
Moldering Gym, which first finds a land and then manifests dread, adding up to 3 cards removed from your deck. So it's quite easy to have 10+ cards like that, which can lead to you tearing through your deck at high velocity.There are several solutions you can enact here. The simplest is to avoid putting too many of these cards in your deck - but unfortunately you will often want to simply because quite a few of these cards are quite good. This can especially be hard to avoid if you want to go deep on the manifest dread synergy; and specifically quite problematic if you're also playing synergistic value cards like
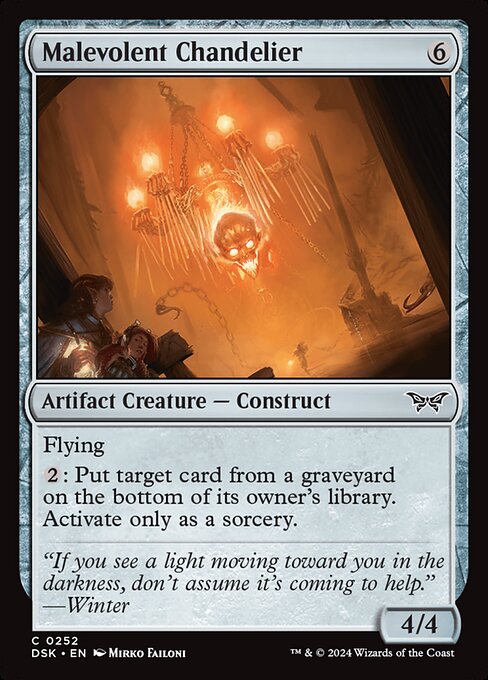
Oblivious Bookworm that also tear through your deck.The second solution is to play a card like
Malevolent Chandelier in order to pad out your deck when you near the end. Nicely, since Chandelier is a creature, you are never forced to mill it over with manifest dread - if you feel that the game is going towards decking, you can make sure to put it facedown whenever you see it. But unfortunately, the problem with this solution is that Chandelier as a card is... not amazing, to say the least. But, sometimes you need to do what you need to do. And spending one card slot on a Chandelier isn't that bad, in the grand scheme of things.The third and definitely spiciest solution is, of course, simply playing more than 40 cards. I've been experimenting a lot in this space personally, but at the same time I would highly recommend you stay away from this solution unless you know what you're doing. It's a very murky space, involving many very hard decisions that are nigh impossible to evaluate well - and the costs are almost always very hard to properly account for.
That said, if you do want to learn how best to figure out how and why to play more than 40 cards, you can check out this article I wrote in LCI - the context is slightly different, but the concepts are still all the same.
Load-Bearing Mills
The reason, though, that I personally have been experimenting a lot with playing more than 40 actually ties into the other downside of playing a bunch of manifest dread: you can sometimes mill over a card that is quite important stays in your deck.
By far the most common version of this is when you see your single splashed basic land when manifesting dread. This can be quite problematic if you're relying on basic-fetching for fixing - and there are
quite a lot of those in this set.So then, how can we avoid this? Well, one way is to play a higher card count - though that has many problems, as mentioned above. And of course another way is to simply splash less in decks that manifest dread a lot - but sometimes the splash is too enticing to give up.
One of the cleanest solutions is to play more than one splash basic, or simply more fixing that doesn't depend on basics. It's much harder to randomly mill over both of your splash basics, and you'll also more often have access to that basic before you manifest a lot of dread.
But honestly, sometimes knowing is half of the battle. If you suspect that having access to your splash basic will be important this game, consider delaying your manifests when it's reasonable to do so. It's a fairly unlikely happenstance, and so by far the worst case is when it catches you completely off-guard.
Finally, while the most common load-bearing cards by far are splashed basic lands, they aren't the only cards that can be dangerous to mill.
Occasionally, you might have a deck that relies on roughly a single card to win grindy lategames - often this comes in the form of a rare with a lot of condensed lategame power, like
Walk-In Closet or Central Elevator. If this card is a noncreature, then you might want to be careful in certain games that milling over such a card might mean you lose access to your powerful lategame tool.This is, of course, only relevant in games so grindy that you could expect to see your entire deck. But in those kinds of games, losing such a high-impact card can very much spell the difference between being able to outgrind your opponent enough to win, and simply losing to decking. And again, recognizing when this is the case is the most important thing you can do here.
Part 4: Playing with Manifest

wanna guess what 'ILTG' stands for?
Partly because it has so many synergy hooks, manifest dread has also proven to be a mechanic that leads to many many small but important decisions. Every instance of manifest gives you two choices; every facedown creature gives you an additional way to spend your mana at instant speed; and every facedown creature your opponent controls represents many many possibilities that you now have to consider and play around.
Figuring out when to flip creatures up and what to play around your opponent's manifests being is more tied to general gameplay skills. The former mostly involves the general skill of sequencing and prioritizing plays; while the latter tests your format knowledge and ability to read your opponent.
But the question of which of the two cards you see when manifesting should be put facedown is a simpler decision, and one that I can provide more concrete guidance for. Specifically, I find that the best framework generally is to simply consider how much value each card provides in play vs in your graveyard.
Creatures obviously provide the most value by default by being in play - but there are also situations where a noncreature can provide value by existing on the battlefield, because it might get bounced to your hand, whether it be by you or by your opponent. There have been a few rare situations where I've even chosen to manifest an especially important noncreature over a creature, simply because I wanted access to that noncreature with a bounce spell more than I cared about flipping the creature faceup at all.
Likewise, the biggest consideration for graveyard value is delirium, but there are niche cases where you might have other synergies too. And on top of all that, you can also think about the fact that your opponent will get the immediate info only of what you put in your graveyard, not what you put into play. Information advantage is extremely nebulous and hard to get value from, but there are definitely spots where it can be quite relevant.
Conclusion
For how simple it is conceptually, manifest dread is one of the most dynamic mechanics we've gotten in quite a while. It has so many synergy hooks, introduces so many things to consider, and creates so many interesting decisions points in games.
If I had more time and patience, I could probably write at least twice as much about this mechanic - it's certainly one that provokes a lot of thought, even if much of that thought will only be very narrowly useful. But of course, Magic is a game that is often won and lost on narrow edges - so I hope that those narrow thoughts that I have included here prove useful as you explore this format.
#FreePalestine | Consider donating to UNWRA or PCRF, supporting protesters locally, and educating yourself.
