
Exploring the Craft of Gameplay in LCI
12/01/2023
The Lost Caverns of Ixalan is a very complex set. There's a lot going on, between double-faced craft cards, an archetype involving draftable cave lands, a graveyard mechanic, and quite a few
individual buildaround cards.And this complexity doesn't just manifest itself during the draft - games can be quite complex too. With natural mana sinks from craft, micro decisions from explore, controlled randomness from discover, and lots of tracking from descend, there's quite a lot of edge to be gained in gameplay. And to add onto all of that, board states can end up getting quite clogged, as games tend to go bigger rather than smaller.
So I figured this week would be a great time to talk about gameplay in this set. I'll mostly be focusing on things specific to LCI - the specific mechanics and cards - but also tie those to bigger picture concepts as well.
Part 1: Explore
Explore is a fairly skill-intensive mechanic. It's somewhat similar to scry in the decision it presents, but comes with a bit of additional nuance. Unlike scry, cards not kept on top go to your graveyard - so you also have to weigh the value of filling your graveyard as part of the equation.
The fact that explore can draw a land also makes sequencing a bit harder - you might often want to explore before playing a land, just in case you'd rather play the land you hit off of explore. And if you do that, you need to think carefully about sequencing and tapping your mana, so that you don't accidentally lock yourself out of certain lines.
But the complexity goes deeper still than that.
Information
Due to a confluence of factors, there are a lot of random small sources of extra information this set. In my article about playing >40 cards, I mention that this set has a lot more reasons to play bigger decks than usual - and that's because it just has so many ways to see more cards. Amusingly, this applies to your opponent's cards too!
Every time your opponent explores, you see what card they explored - either a land to hand, or a spell they surveiled. When this happens, you should pay close attention, and start planning your moves to account for the new information.
Are they about to draw a big threat? Maybe that pushes you to save your removal so you can answer it. Are they drawing a removal spell or some other way to push damage? Maybe you have to play a bit more defensively the next turn. Have they kept something on top that sets them up for the lategame but is poor tempo? Maybe you should take this chance to pressure them more.
It can also be important to note what your opponent chooses to keep and what they choose to mill. Normally you only get to see if an opponent's scry goes top or bottom, but with explore you get to see the card as well! Most relevantly, if they bin a really good spell, chances are they either have recursion or are digging for lands.
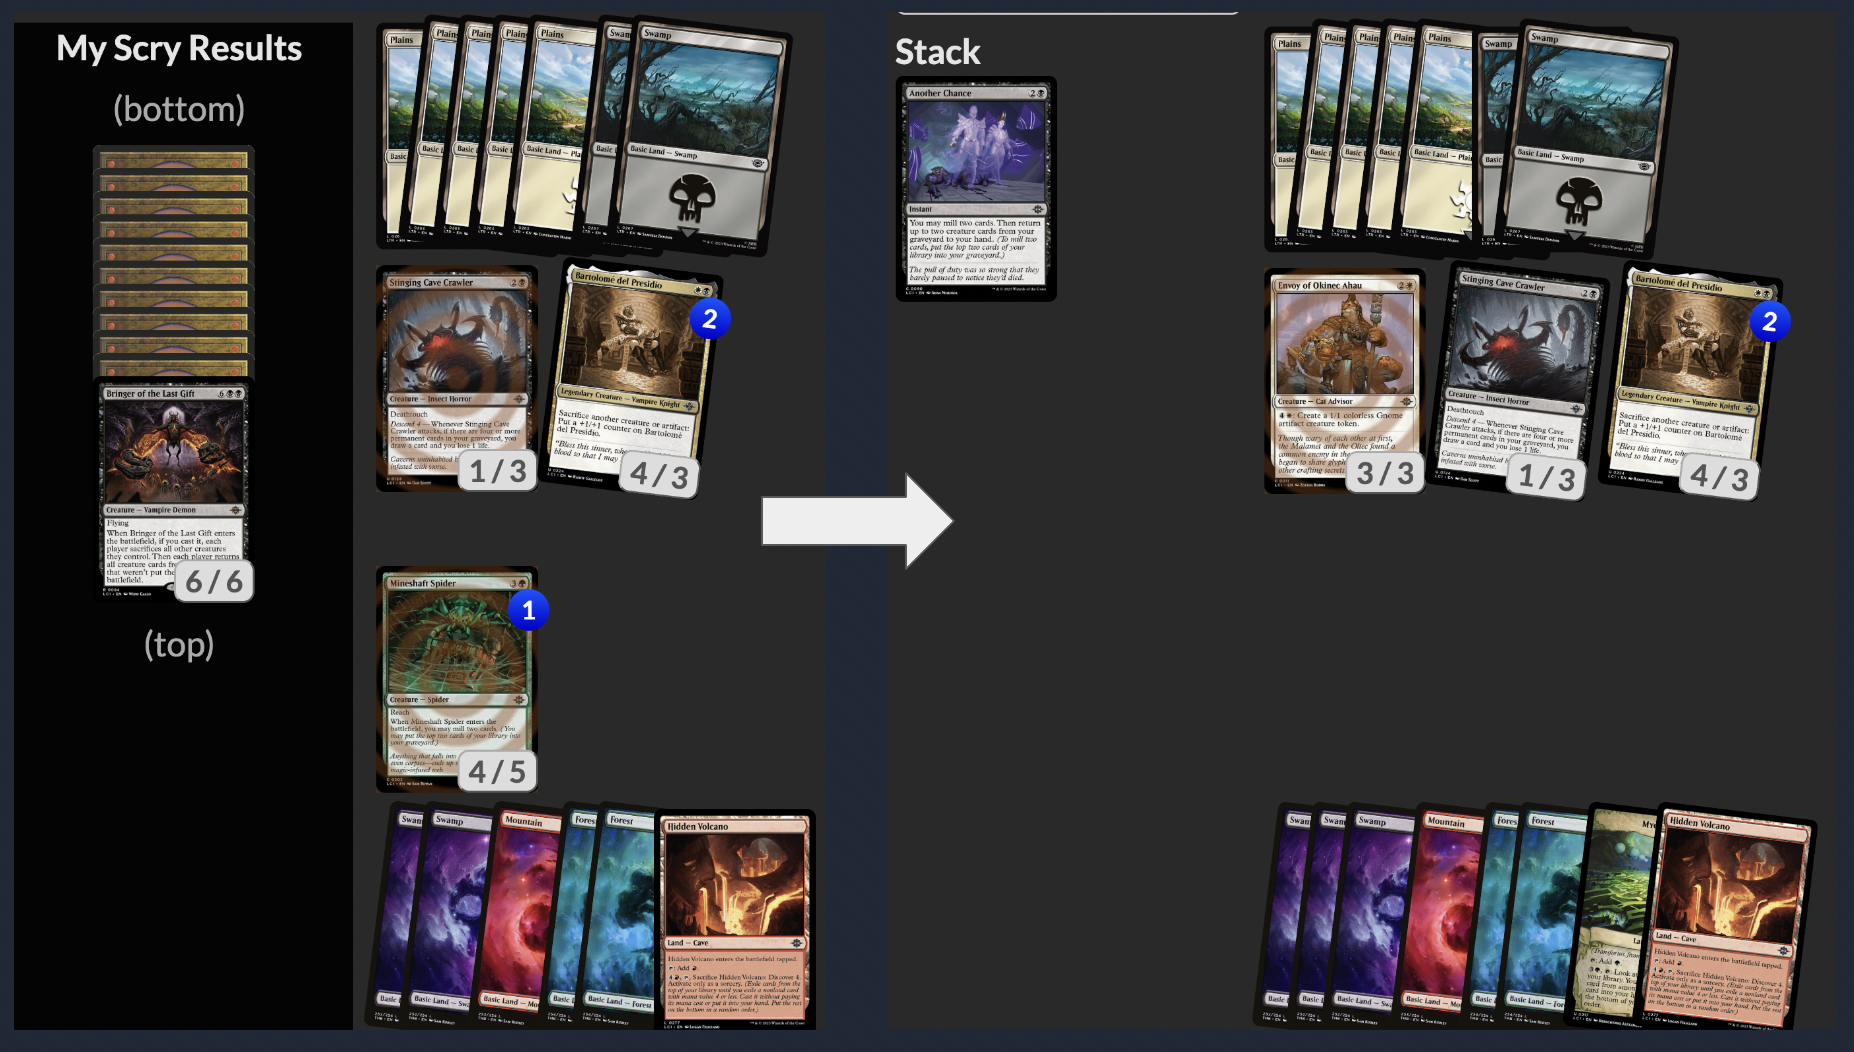
A spot in the Arena Open Day 2 Draft 1 where I explored a Bringer of the Last Gift into my graveyard with 8 lands and then passed with 3 mana open. My opponent should've suspected something fishy, but instead they overextended into me using Another Chance to get back my wrath (mostly killing the spider was sketchy).
Tracking this on Arena is certainly easier than in paper - Arena will keep known cards revealed, while in paper you'll need good memory, good notes, or an opponent playing open. But I would highly recommend expending the effort - even just the act consciously paying attention to what your opponent has can make a big difference.
Mapping it Out
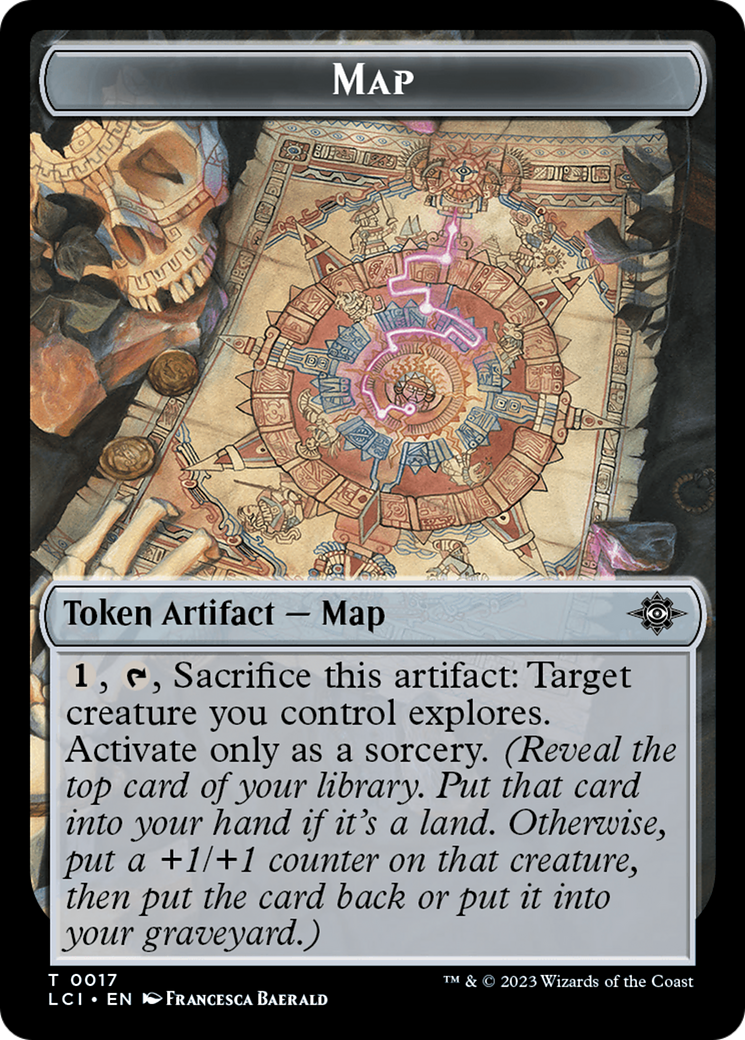
About half of the explore in the set is tied to ETBs, but another half is tied to maps. And maps pose quite an interesting and important decision: which creature do you have explore?
The most relevant consideration is the possible +1/+1 counter - if you hit a land, it doesn't really matter which creature explored. Naturally, +1/+1 counters are better on creatures with keywords. A good baseline is to just grow any flyers, lifelinkers, etc. that you might have.
However, you should also strongly consider combat. There's many situations where the difference between having a 1/2 and a 2/3 can be the difference between your opponent getting 8 free damage in or having no good attacks - and if you're on the defensive, this can certainly be more impactful than growing your already-bigger-than-everything flier to be slightly bigger.
A good general metric for determining which of your creatures benefits most from exploring is to just check how many 1-on-1 and 2-on-1 combat interactions get improved. A 2/1 growing to a 3/2 does better against 1/1s or 2/3s, but doesn't meaningfully improve if you're facing a lot of 2/2s or 3/2s.
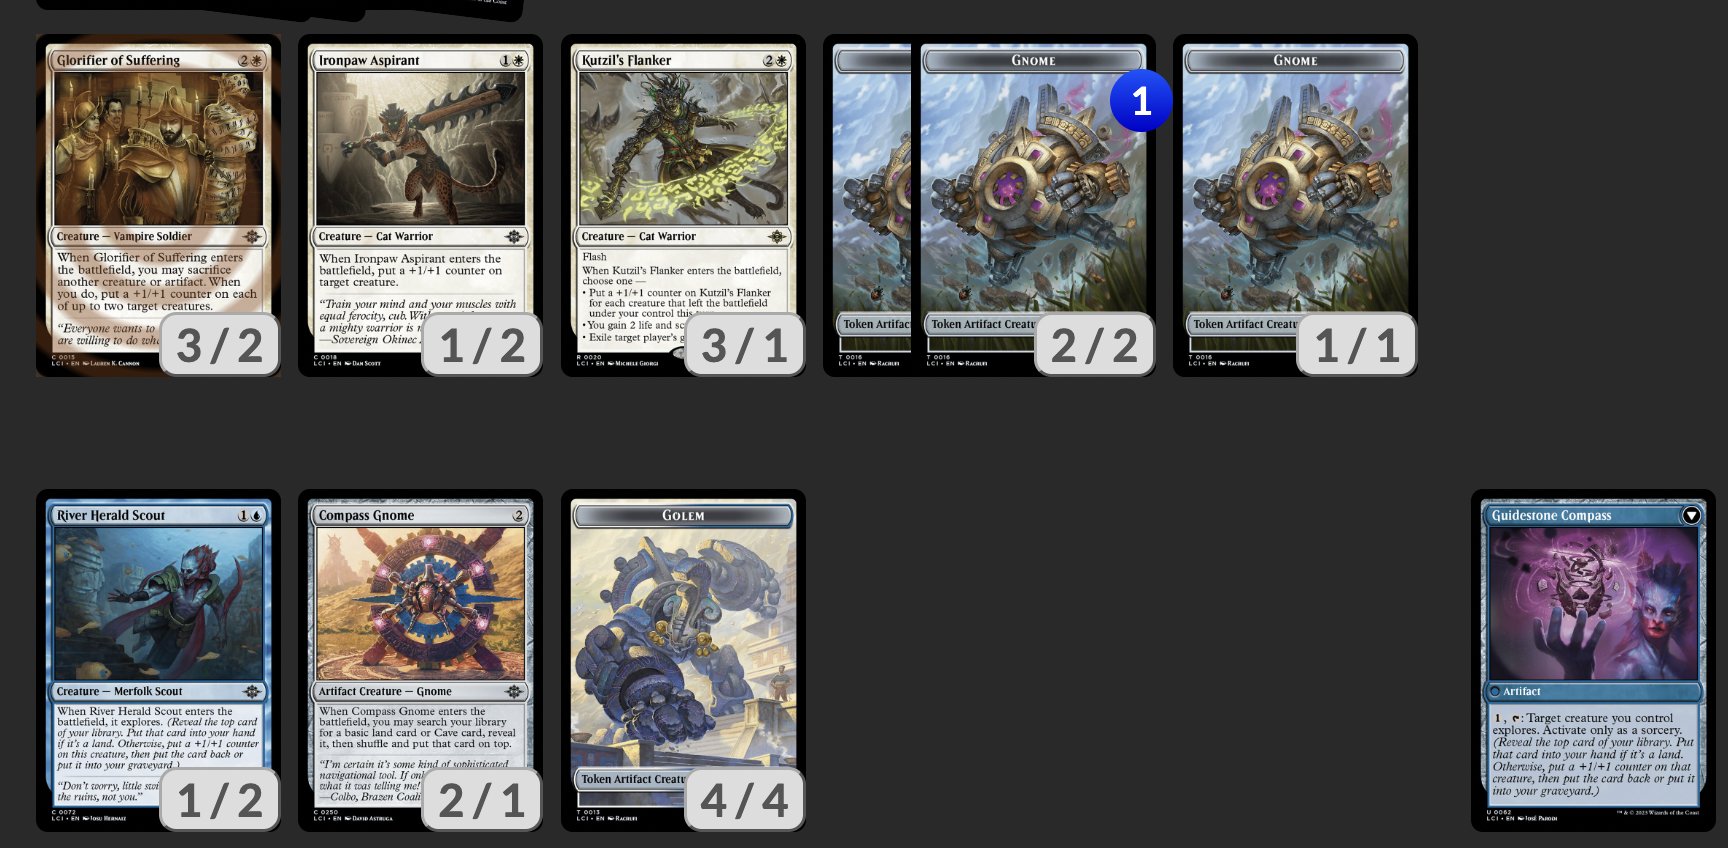
An example situation, where the 2/1->3/2 only grows past the 1/1, and a 4/4->5/5 gets double blocked mostly the same way, but 1/2->2/3 interacts much more favorably against most of the board.
Of course, there is another thing to consider: if your opponent removes your creature in response to a targeted explore, the ability fizzles and you don't get the explore. So, if you strongly suspect your opponent has instant speed interaction, that should push you towards either not exploring on your best creatures, or even just not exploring at all that turn.
Part 2: Discover and Caves
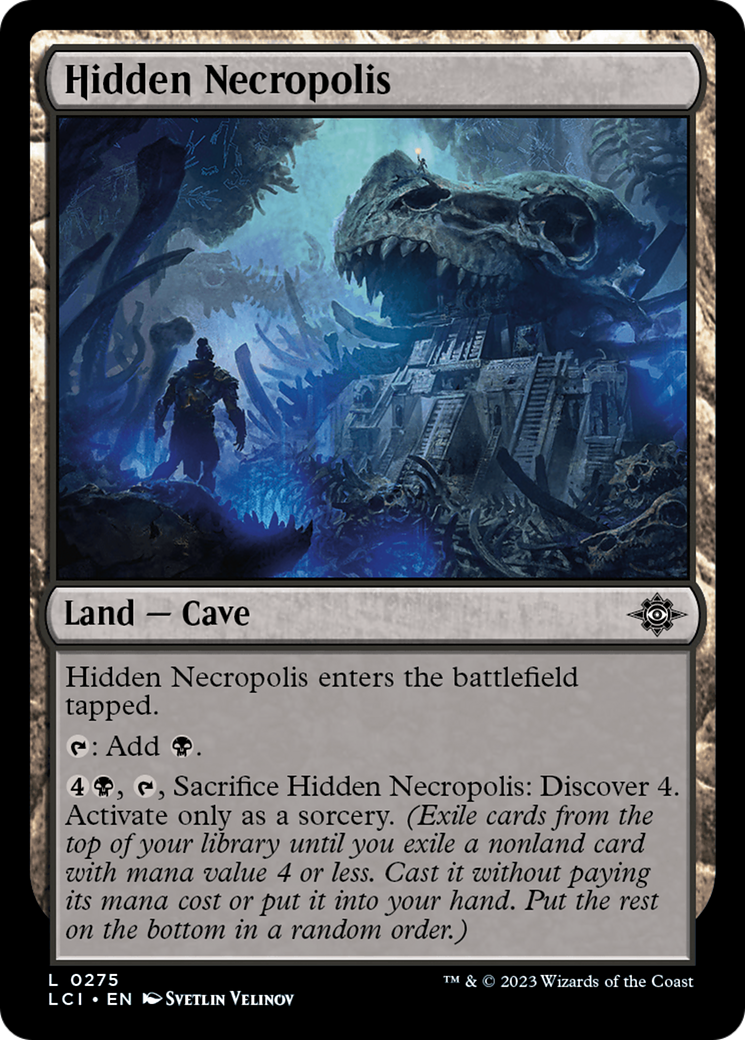
With all the caves and craft running around, you'll often have multiple options for how you can spend your mana. So, how should you decide when the best use of your mana is sacrificing a
cave to discover 4?Well, a good rule of thumb is to just not use your caves until you're out of other productive things to do. This is because, if you are still at the point where you have many choices for how to spend your mana, then chances are you'd rather keep having more mana on the board. If you start aggressively sacrificing caves, you might start having your other options get clogged in your hand.
Of course, this doesn't have to mean you only ever sacrifice caves when you're empty-handed. Sometimes you'll have spells in your hand that you'd just rather wait on using - cards like
Cogwork Wrestler, or removal spells that you want to save for more important threats. Note the wording I used above: if none of your other options are productive, you should strongly consider just using the cave.
I have a lot of options for things I could do, but none of them except sacrificing the cave really do much. I don't care about their creatures and want to wait to get more value with my wrath, and I don't have a creature to use Needle with.
But besides cases like those, it's also very important to recognize when you have to sac your caves. This can happen quite often when you're behind - if none of the spells in your hand do enough to stem the bleeding, sometimes you just have to hope the top spell in your deck can do the trick instead. Probably one of the most common ways this can manifest is when you really need removal, but don't have any in your hand.
When it comes to these hail mary lines, it's important to know what your outs are! This is always an important skill in Magic, but discover caves do a good job of highlighting it - you don't want to crack your discover cave to try find removal if you don't have any removal left in your deck. You should have a rough sense of what you can hit with your discovery, so that you can judge if it's worth it.
Tips and Tricks
In addition to the cave-specific advice, there's also a few random discover tips and tricks I can offer:
First of all, remember that, while it is quite random, discover does come from the top of your deck! So if you have things that manipulate the top of your deck - say, maybe a certain exploration mechanic - then you can sometimes know what you're discovering into. This goes the other way as well - you can use
Unlucky Drop to force a large creature to the bottom in response to your opponent's discover.Second, remember that you can always choose to put the card in your hand! If you hit an
Abrade off of discover, you don't have to point it at an irrelevant 2/2. Yes, you save some mana by doing so, but it's often much more important to have your removal saved for a crucial target.And finally, pay attention to what your opponents reveal when discovering! Chances are it will be mostly lands, but sometimes they will flip past some expensive cards. This is just more information about their deck, that could very well be useful for sideboarding and future games. Sadly, it's somewhat hard to see the passed cards on Arena (the popup is only available for a short time), but in paper you can and should take notes.
Part 3: "Convoke" in Limited
There are several red and/or white cards in this set that can tap 2-3 artifacts and/or creatures for various effects - and all of these are sorcery speed only. So, naturally the question becomes: how many creatures can I afford to tap? You will often have artifacts lying around that are free to tap, but the more creatures you tap, the fewer blockers you'll have.
My general advice would be to visualize what happens if your opponent has one removal spell. Can you make it so that you still have good blocks? Can you afford to play around the removal spell in that way? 2 pieces of interaction on the same turn is pretty rare, and you generally can't play quite that scared anyways; and on the flipside, assuming your opponent can't interact can be very dangerous.
Really, you should be thinking roughly the same thing as how you'd attack if your creatures were unblockable - but of course, you're not getting in nearly as much damage. Instead, you're getting some other benefit, and you need to evaluate whether that's worth it. I've seen many opponents grow a
Adaptive Gemguard a bit more than necessary, opening up a window for me to remove it and massively punish them.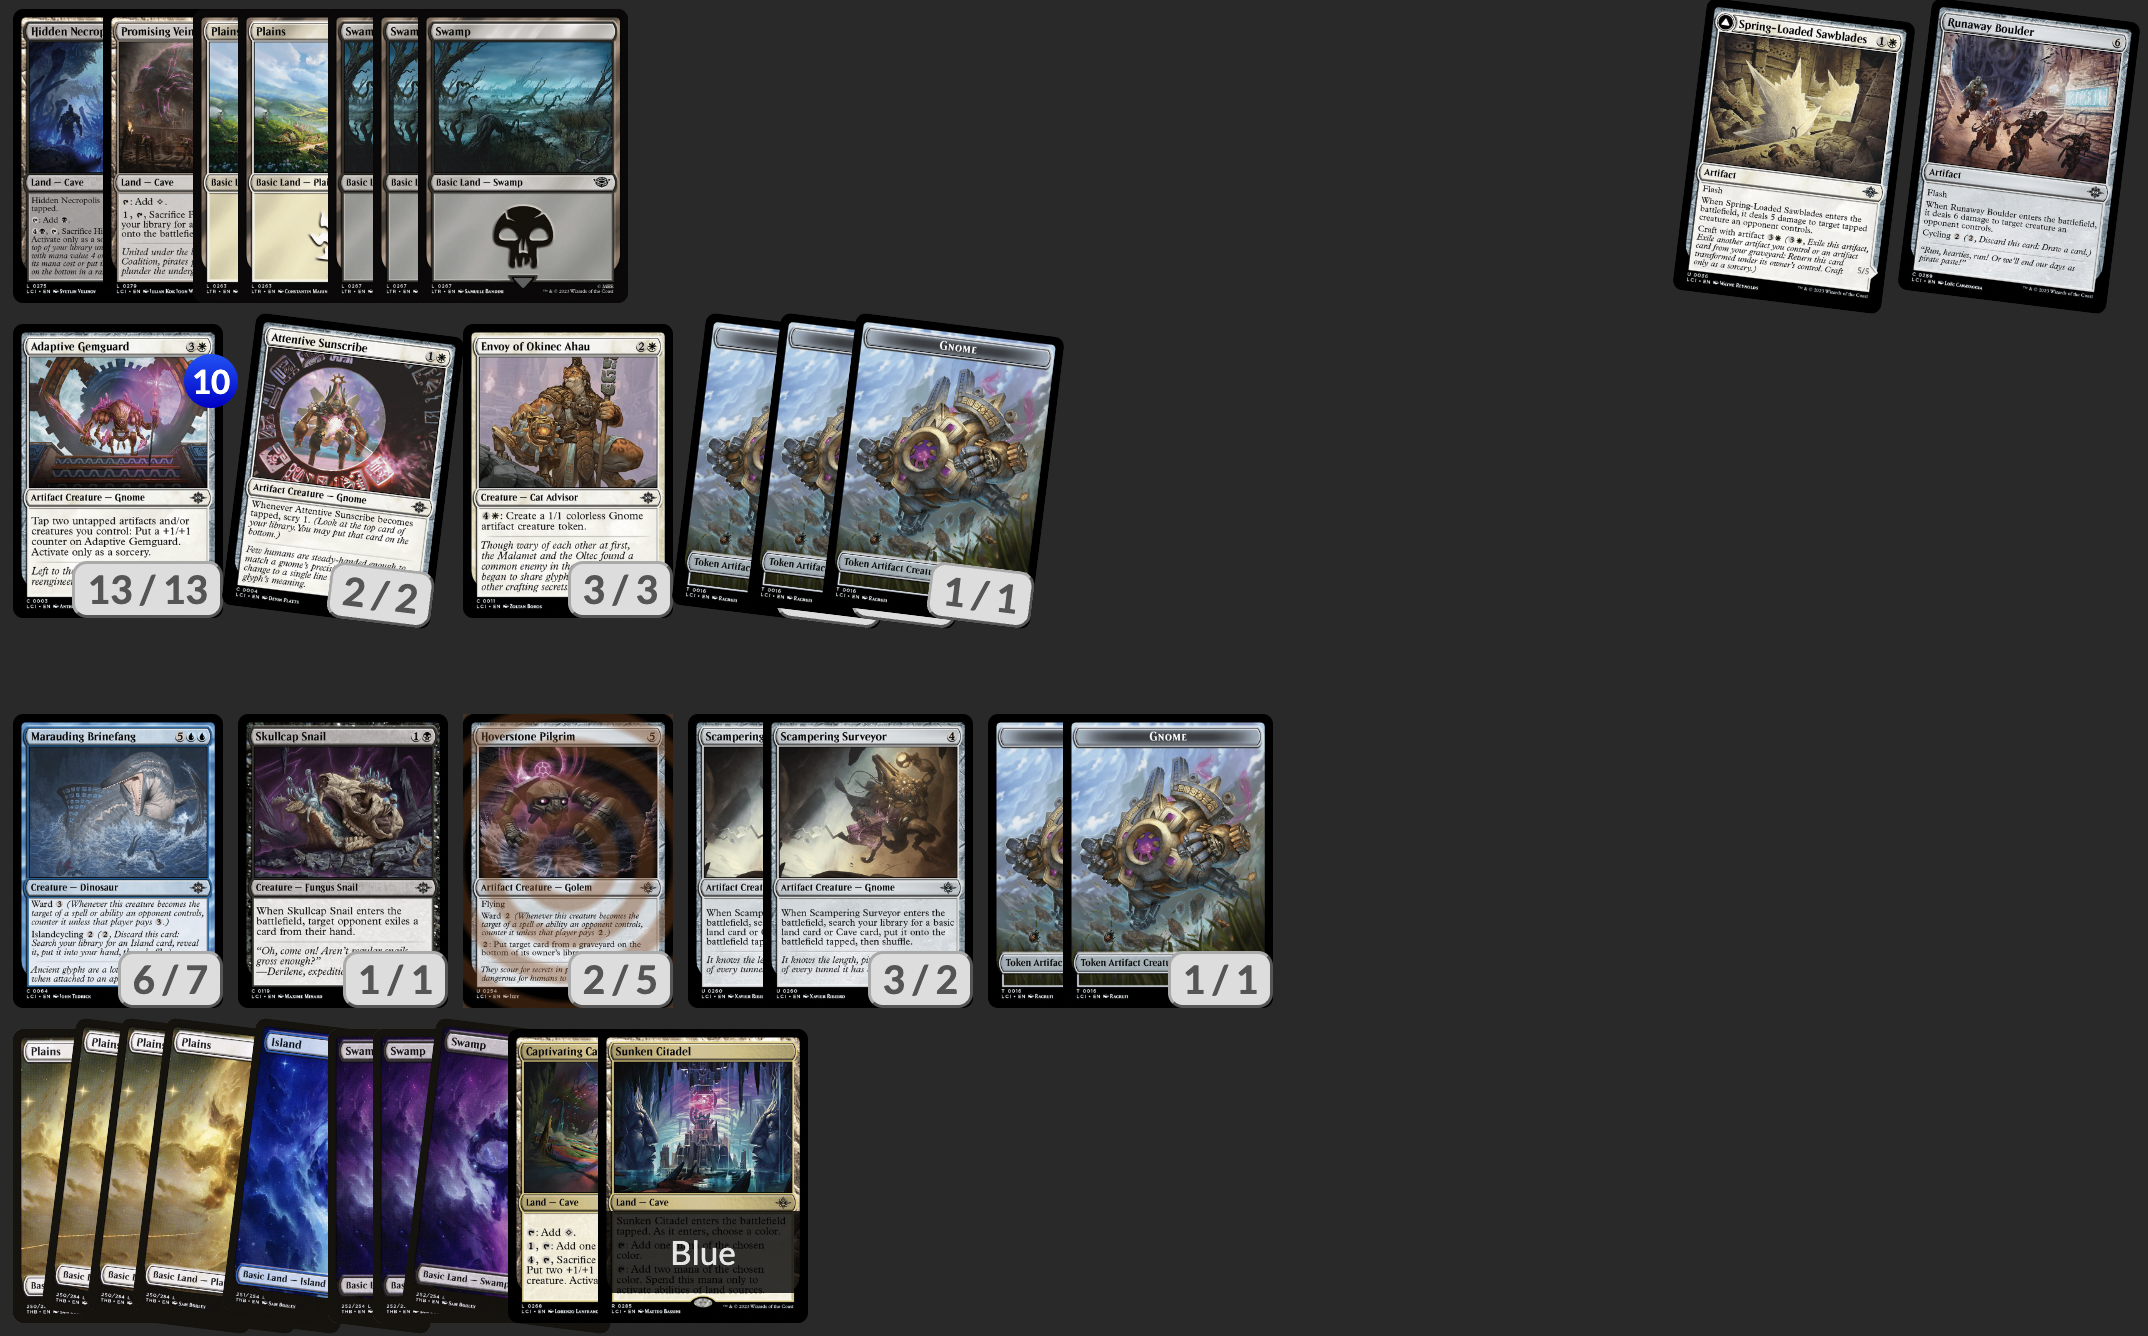
An example of an opponent over-tapping once; the Gemguard has reached a point where its size is already roughly infinite, they don't need to let a removal spell give me a better attack. The scry from tapping Sunscribe is good, but they should not tap two 1/1s, which can meaningfully block my 3/2s.
Part 4: Descend
At first glance, descend might look quite simple - you're mostly just counting one number, the number of permanents in your graveyard. But the emergent play patterns can actually get quite nuanced.
First of all, though most of them are bad, all the payoffs that ask you to repeatedly descend present a bit of a minigame. Unlike the other forms of descend, you want a slow trickle of descending, instead of large bursts. The most basic way to enable this is just trading with your opponent - but this can be hard, as you might not have any good trades, and your opponent can just refuse to block.
But even without trading, there's several ways to ensure you're descending. Landcycling and sacrificing caves both count, as does exploring a card into the graveyard; you can coordinate these effects such that you get the trigger every turn. Just remember that tokens don't trigger descend!
All the other descend payoffs play out pretty differently - whether you want descend 4, descend 8, or a fathomless descent, you generally just want to mill yourself as much as possible as quickly as possible.
This can lead to some important sequencing decisions. If you have a lot of descend payoffs, you should probably prioritize turning on those payoffs. Pay attention to the breakpoints and plan ahead - how are you adding everything up to 4 or 8? Are you playing a mill 2, and then trading off two cards? Maybe a landcycler or explore thrown in just in case the mill hits a non-permanent or the trades don't happen?
In some cases, you can even consider giving up cards to better fuel descend. If your descend payoffs matter enough, it can be correct to take only one creature off of
Another Chance, or chump with an irrelevant creature.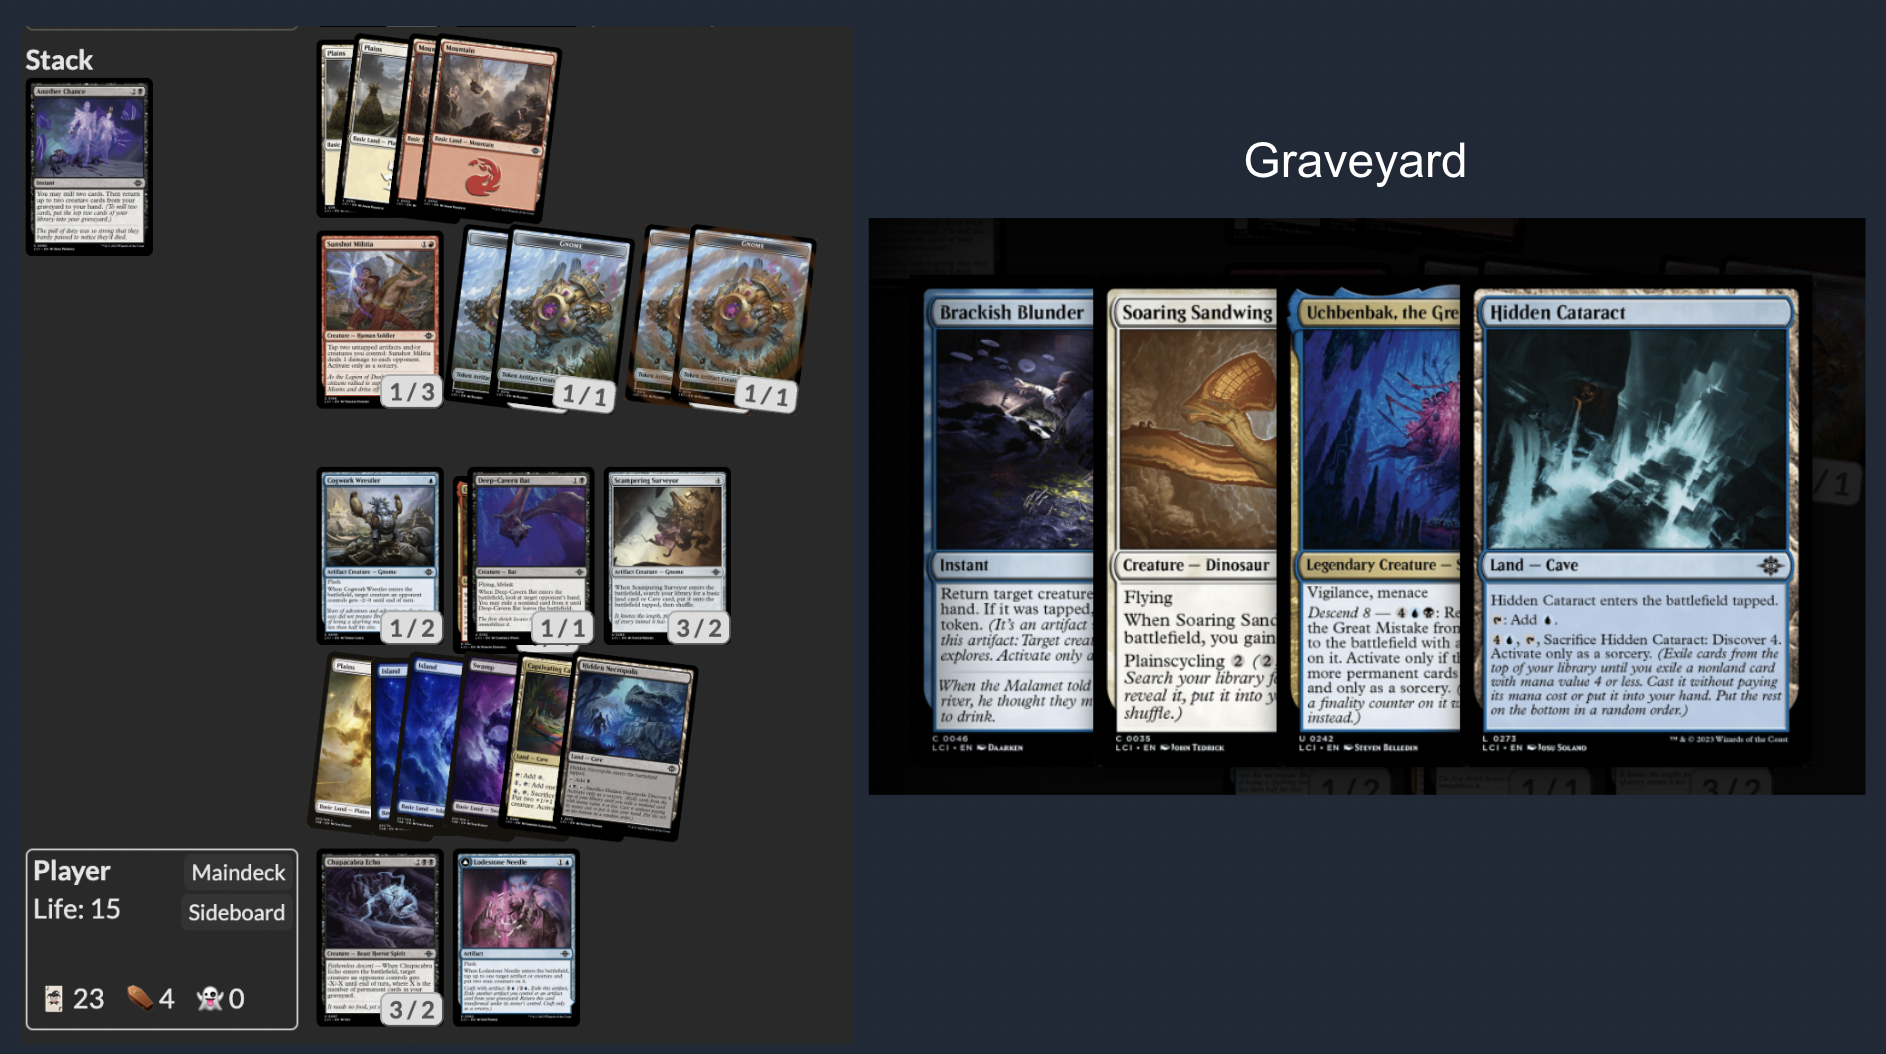
In this spot, I chose to only get back the Sandwing with Another Chance, leaving Uchbenbak in my graveyard. I reasoned that I wouldn't want to cast Uchbenbak for a long time - long enough that I'd have descend 8 by then - and I'd rather have faster access to a bigger Chupacabra trigger.
It is also quite important to pay attention to your opponent's descend count. Keep track of what payoffs they have and how close they are to turning on descend. Consider the benefits of not trading - if they really need to descend and are clearly lacking in ways to do it, trading can be really good for them as a way to put things in the graveyard.
As always, try to imagine the game from your opponent's point of view - What is their plan? What do they want to happen? - and then try to disrupt that plan.
One final note on descend: while Arena nicely displays the descend count on cards that care about it, it's up to you to keep track of this in paper. Don't be afraid to regularly be checking your opponent's graveyard, making sure you know exactly how many permanents are there. I would even highly recommend maintaining some separation of permanents from non-permanents in graveyards, for both players' sake.
Part 5: Removal
This isn't quite a mechanic in the set per se, but there is a somewhat unique part of this set that is quite related to removal: the bombs.
There are
a lot of cheap and efficient bombs in this format. It's enough that it's kind of a defining part of the format - you will often need to have removal or have a plan to kill your opponent, otherwise you can find yourself getting overwhelmed pretty quickly by these bombs.Partly because of this, you need to know when and how to use your removal effectively.
If you're an aggressive deck, you should probably just be using removal aggressively. You probably care a lot more about removing blockers and getting in damage, so that even if your opponent draws a bomb, they'll be dead before it matters.
Less aggressive decks have a harder triage decision to make. Always remember to consider what your gameplan is, and what really matters in a game. If you're on the defensive, you'll often have to spend removal on key threats - most commonly flyers or big creatures you can't block - but be sure to distinguish between actual problematic threats you need to remove, and ones that you can reasonably neutralize in other ways (like blocking) to save your removal.
If you're planning on going to the lategame and winning by out-carding your opponent, you probably shouldn't be spending your removal on clearing blockers - but you should also be on the lookout for situations where you can switch tracks and just kill your opponent. A dead opponent can't draw out of the situation.
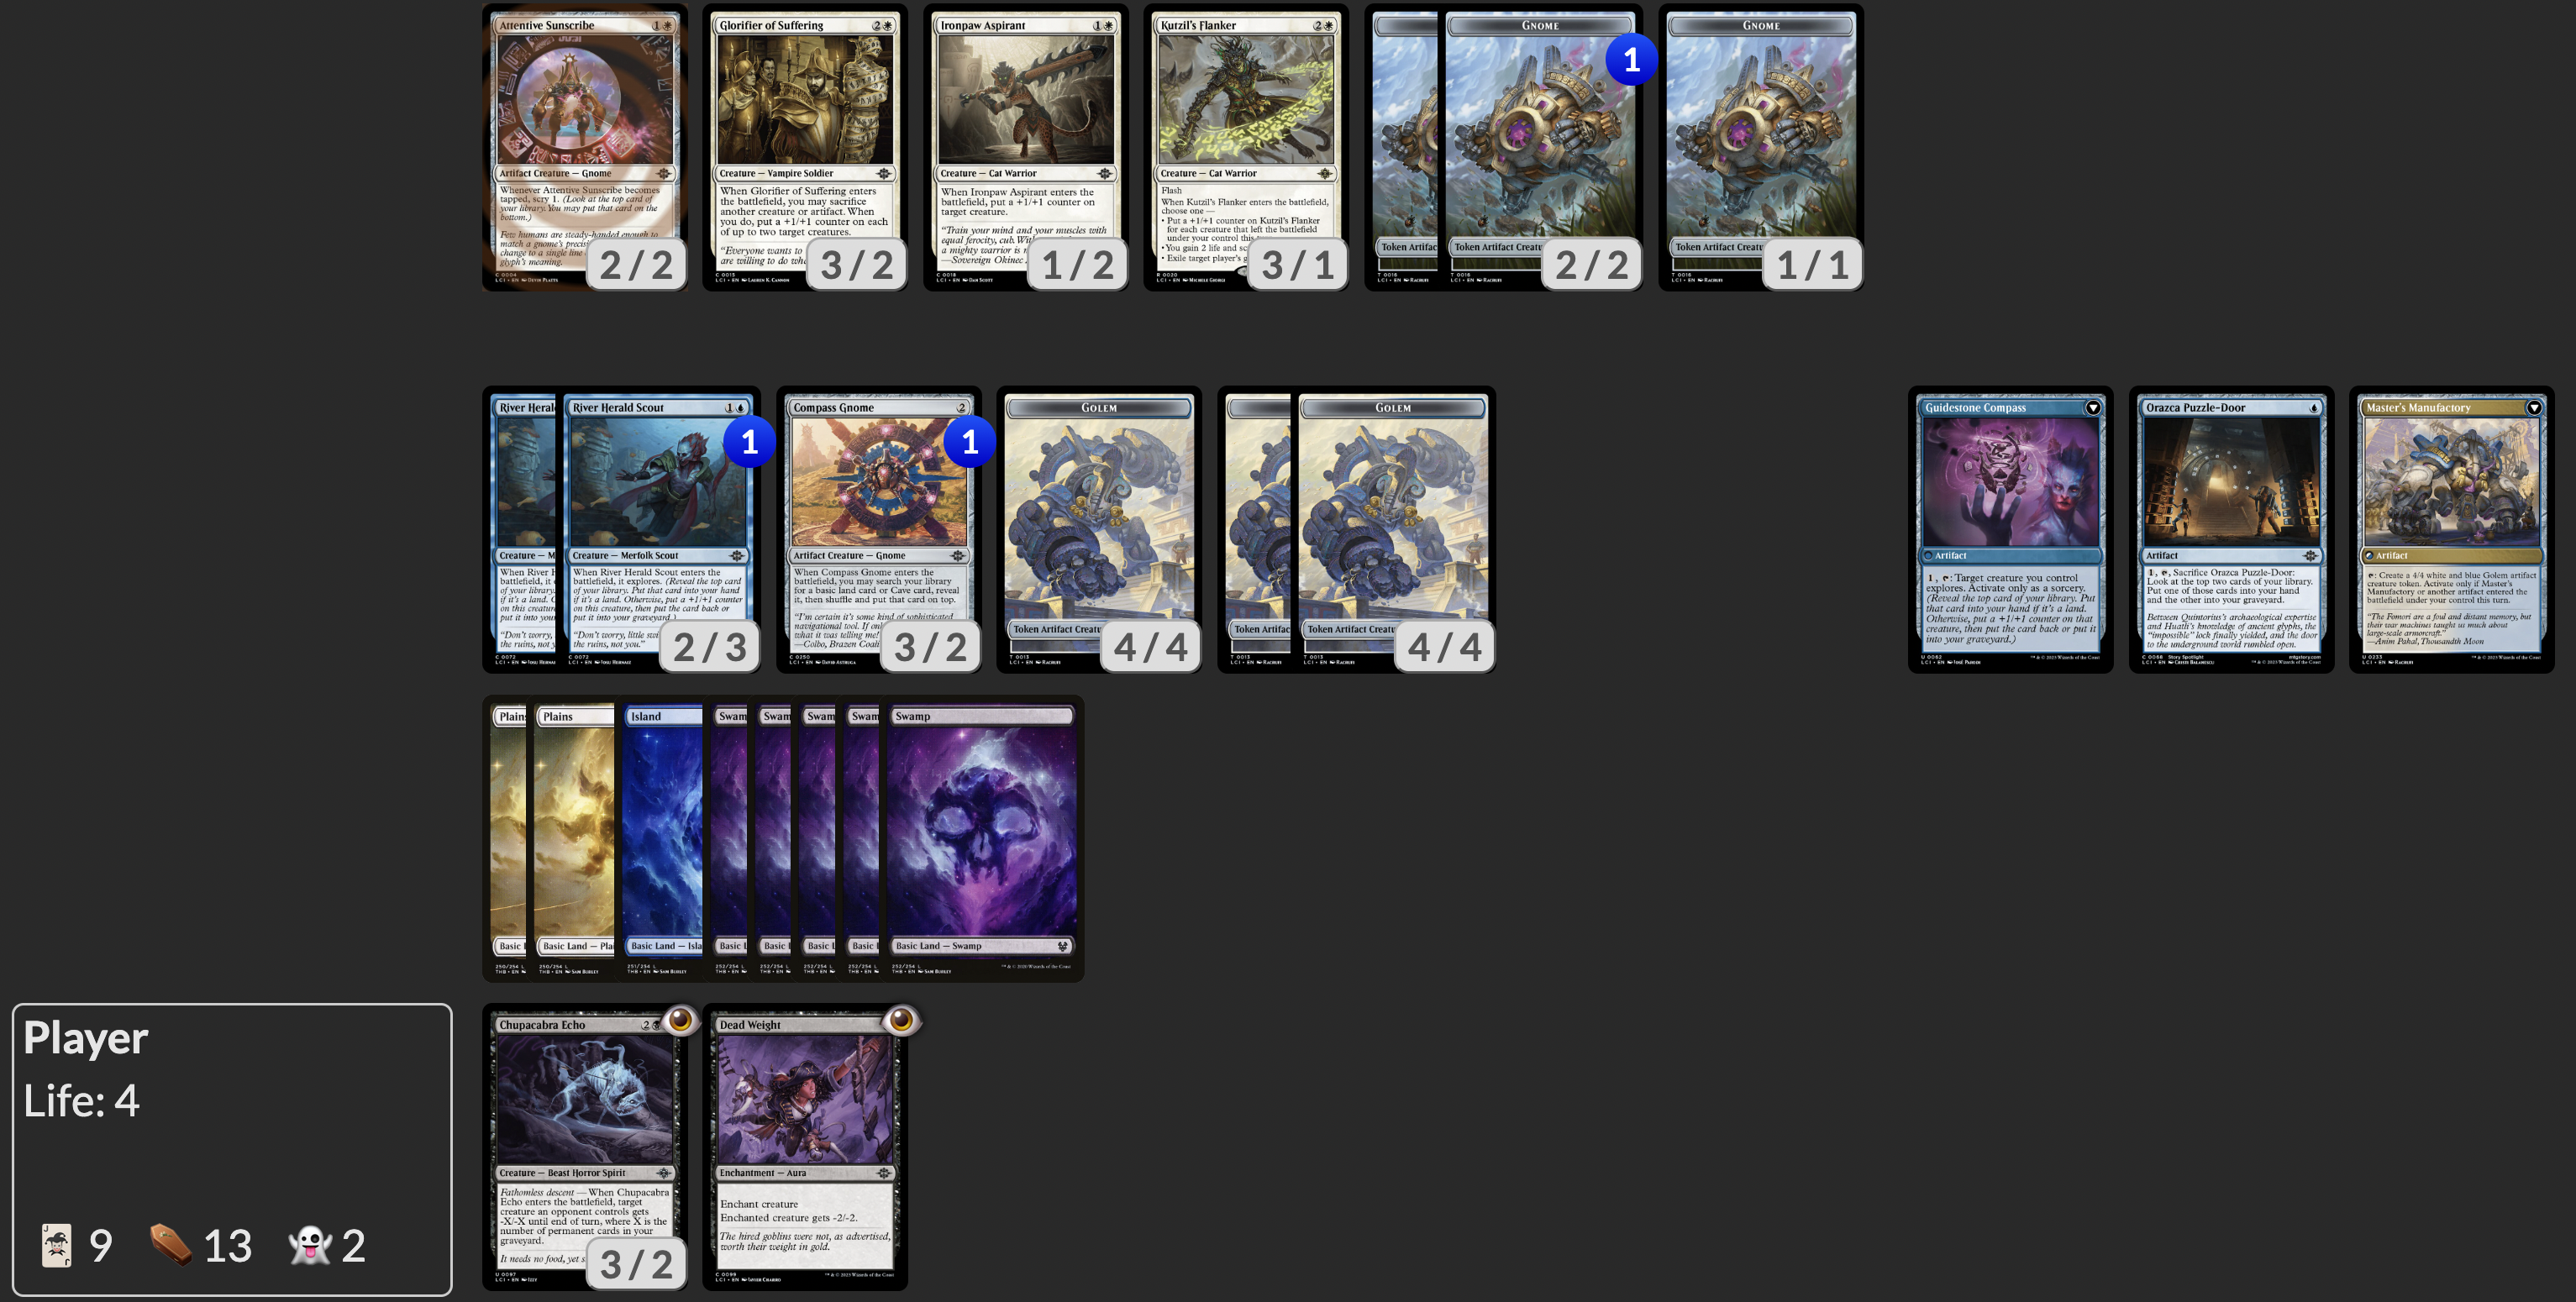
I've been holding this Dead Weight here for a flyer, and I could keep holding both it and the Chupacabra for threats, but now is the perfect time to turn the corner, using both removal spells just so I can safely attack and get them dead in two turns.
Conclusion
Personally, I'm quite happy with the complexity of this set. It might not be everyone's cup of tea, but I quite like all the nuances and small details present all around, throughout drafting, deckbuilding, and gameplay.
There's just a lot more decisions you can make in the set, a lot of agency that you have over how your draft goes and how your games play out. Hopefully today I've helped illuminate how to better think about some of those decisions.

#FreePalestine | Consider donating to UNWRA or PCRF, supporting protesters locally, and educating yourself.